My word, time flies when you are busy. I’ve had quite a bit of stuff going on, but haven’t felt inspired enough to relate any of it. I will now try to get you all caught up.
A while back I posted about the curiously conductive mortar I had used to encase my souped up crock pot. The video was pretty self explanatory. To solve the problem, I bought a tube of some stuff designed to repair holes in exhaust systems. I don’t know if it is technically an epoxy since it did not require mixing, but it seemed to act like an epoxy. After it dried, I ran my multi-meter test again and there was no stray voltage. I then did a bench test of the crock to see how hot I could get it. I was VERY pleased! With no top on, the wax inside the crock got to 220F and it did not take long to do it. My thinking is that I’m going to have to put a limiting thermostat in to keep it in that range.
The project taking up the majority of my time lately has been repair and repainting the exterior of my wife’s office building.

Be honest, if your building was this drab, wouldn’t you do something about it? You can tell I’d done some spot repair of the paint in the past. Utilitarian, but not pretty. And really, it just demonstrates just how faded the paint on the building really was. My available time has been, for the most part, devoted to surface prep. Quite a bit of powerwashing to remove loose paint and heat gun stripping some areas that had so many layers of paint that the details were lost. The heat gun, by the way, is a new store bought one. I gave up on my repair of the old one. I actually completed it, but on the first test run the heat inside melted one of the soldered wire connections. Too much trouble to go in and re-do things so I just put it aside and chalked it up as a learning experience. The surface prep phase revealed several issues that I felt I needed to take care of. Rotting trim pieces needed replacement. Taking down moldings to strip paint off of them revealed a gap that opened up into the wall interior. That gap needed a couple of cans of spray foam insulation to seal off properly, much to the dismay of the local yellow jacket population. (found an old nest in there, and I’m guessing there was one active somewhere as I got stung) The front of the office is proving a more difficult challenge.

I decided after the powerwashing that the trim on the porch roof needed replacement. A coat of paint was going to hide the rot for only so long. An afternoon of pulling that trim down revealed that the structure underneath had some significant rot as well. I’m currently prepping to take those rotted pieces out. I need to install some temporary supports to hold up the joists that will not be connected to the columns when I do that. I also need to remove all of the nails coming from the roofing above that were nailed into the old trim pieces. I started just popping them up, but some are in pretty good so I’m planning on cutting the rest off under the drip edge.
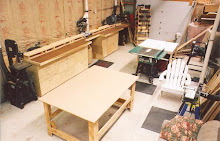
Yesterday at the workshop I had some prep for the porch work and some for the upcoming winter. For the porch work, I had to do a bit of rehab on my framing nailer. I thought I was going to have to replace a gasket or two, but what it really needed was a thorough cleaning and oiling of the piston and trigger. For the winter, I have been working on rehabbing the snowblower attachment for my tractor. Mainly this involved stripping off loose paint and rust, then repainting. One problem I had noticed while doing this was that the drive chain had some frozen links. I soaked it in CLR and left it in there for the entire week. This, as I found out yesterday, was a fairly large mistake! I returned to find the entire chain frozen tight in this whitish, crusty gunk. After the obligatory curse-fest, I started the troubleshooting. Long story short, it took a couple of hours of soaking the chain in heated Simple Green and working each link loose by hand. By the end I had a chain as lithe as a ballet dancer’s spine. But now I had to keep it that way, and I knew that if I didn’t get the watery Simple Green out of the chain it would flash rust in no time. First, I applied a liberal dose of this stuff called PB Blaster, which is a product similar to WD-40 in that it displaces water. Then, I placed the chain in a pot of heated motor oil. This had the effect that one sees when french fries go into the fryer. The water boiled off and was replaced by the oil, leaving a completely lubricated drive chain. I’m almost psyched for winter now. :)
That’s about it for now. I hope to get some in-progress shots of the building to share with you all next time.